
Basic Photo Editing | A Club Click Course
so you’ve been snapping all of these great photos and you’re nailing your exposure in camera…but perhaps your photos still aren’t quite 110%. this is where photo editing comes into play. i’m not talking extensive photoshop editing or anything, but more so the basics-tweaking a few things here + there that will polish your images until they shine. i’m going to show you an image taken straight out of my camera and walk you through a basic editing process. of course, your editing preferences might be totally different from mine and that’s OKAY! i edit all of my images in adobe lightroom which i subscribe to via adobe’s creative cloud. however, you don’t need anything more than the editing software on your computer to play with the basics i’ll be sharing with you so let’s get to work!
first and foremost, here is the image we are going to be working with. again, this image was taken straight out of my camera. no adjustments have been made.
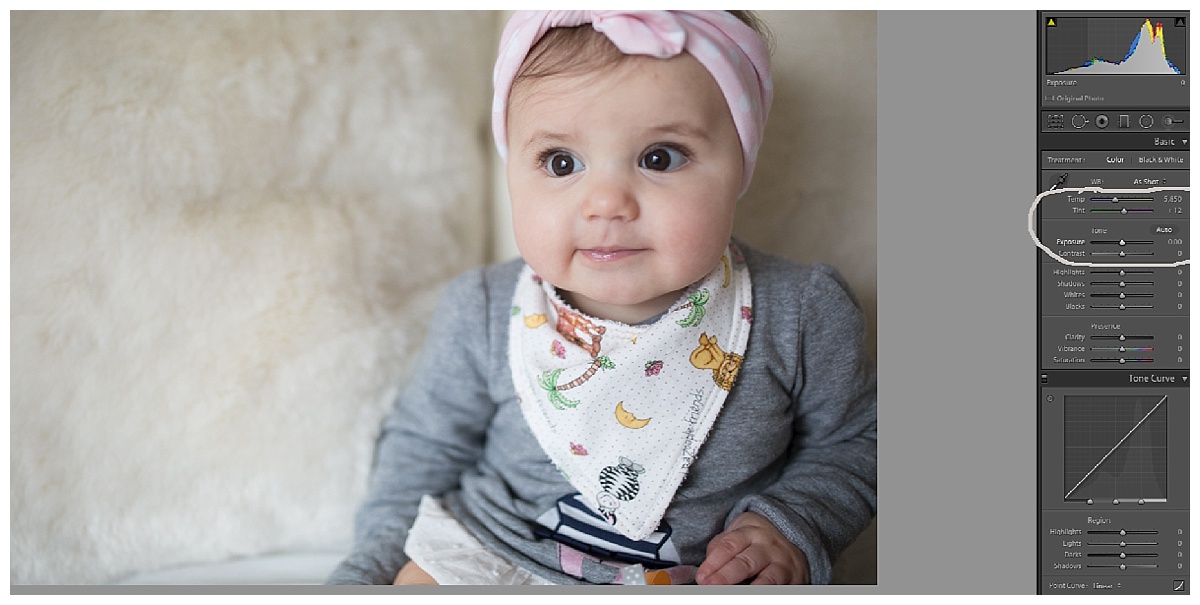
here is a screen shot of my image in my editing software. you’ll see four basic elements circled-these are the four basic edits we are going to make.
when i edit an image, the first thing i do is correct the temperature. the temperature simply refers to the hue of the image with regard to their ‘coolness’ or ‘warmth’ compared to what they look like in real life. for example, in the image we’re working with today, the temperature seems a bit on the cooler side to me straight out of the camera. the whites of her eyes jump out at me immediately-they look more blue than white which means that i need to warm this photo up. you’ll see that there is a number listed next to the ‘temp’ slider in my editing software. depending on what editing software you’re using, you may or may not have numbers accompanying your slider. the number tells me that the current temperature of this particular photo is 5850-since i’m looking to warm it up, i simply click and drag my temperature slider to the right until i am satisfied with the edit. below you’ll see a side by side comparison of the image after the basic temperature adjustment.
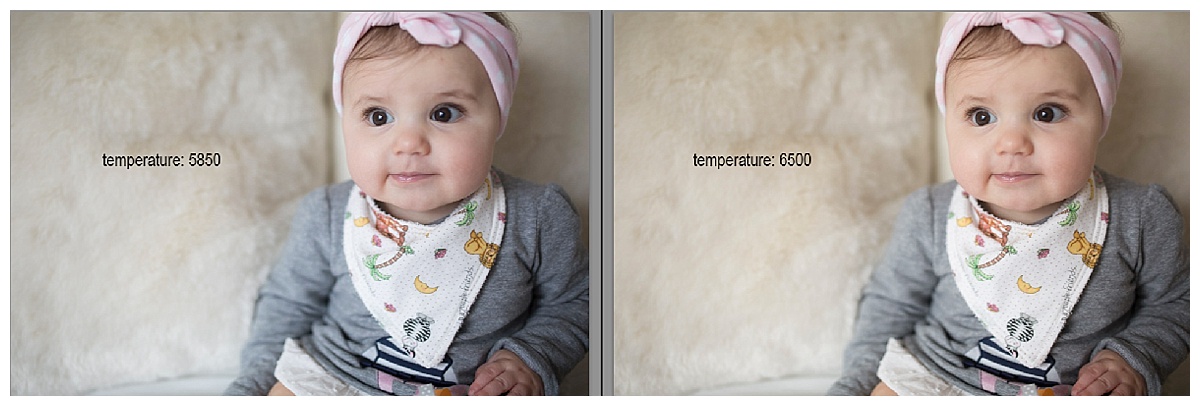
you’ll notice that the image on the right appears more true to life. the whites of her eyes are more ‘white’ than blue and her skin tone is much more accurate. when making edits to your photo’s temperature, a great rule of thumb is to keep an eye on things that are white in your image. if the whites feel blue, warm it up. if the whites feel yellow, cool it off.
once i’m satisfied with the temperature adjustment, i move on to adjusting my tint. tint most often refers to the green and pink properties of an image. after making my temperature adjustment, i notice that the image feels a little on the green side to me. like my exposure, i’m shown that the image currently has a tint number of 12. because the image feels TOO green, i am going to move the slider to the right to add more of a pink tint. obviously, if the image felt TOO pink, i’d simply move the slider to the left to add more of a green tint. below you’ll see a side by side comparison of the image after the basic tint adjustment.
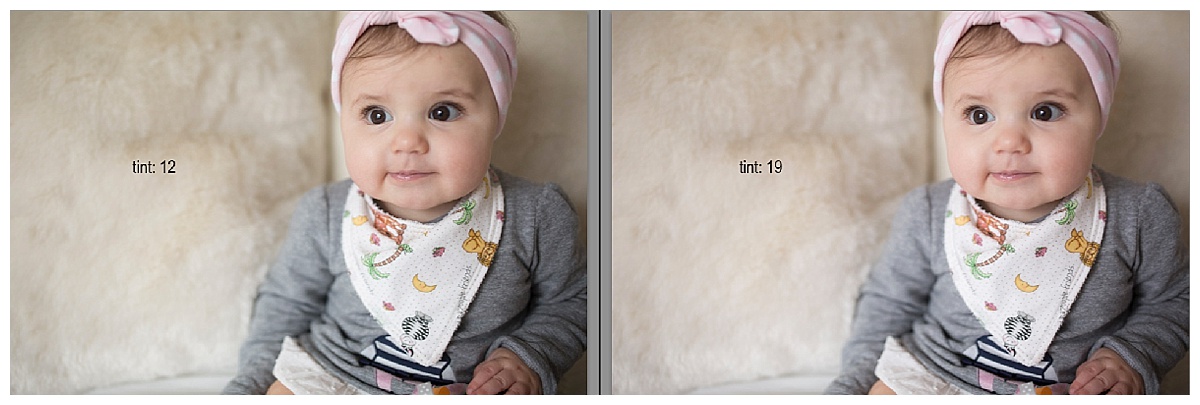
you’ll notice now that the image on the right has a more ‘rosy’ feel to it with the addition of the pink tint. this is totally a personal preference for me–i add pink tint to nearly all of my images to give them a feminine touch. you may very well prefer the image on the left. that’s the beauty of even the most basic editing-you can really make your photos look + feel like you.
once i’ve adjusted my temperature and my tint, it’s time to edit my exposure, which is my favorite part. we’ve talked again and again about nailing your desired exposure right out of the camera, but it’s not always as easy as it sounds. perhaps your image is too dark or too bright straight out of the camera–luckily, you can adjust your exposure to help correct these potential mistakes. i prefer my photos to be very bright so i always aim to shoot just a smidge overexposed straight out of the camera, but i’m not afraid to brighten it even more while i’m editing. below you’ll see a side by side comparison of the image after my exposure adjustment.

as you can see, i simply bumped my exposure up +.50 and it obviously added quite a bit of brightness to the photo. because i love my photos bright, i’m going to leave the exposure right there and move on. you’ll likely be surprised how minor your edits are in comparison to the major impact they have. as they say, less is more.
once my temperature, tint, and exposure have been edited my photo is starting to feel much more polished than it did straight out of the camera. the last edit we’re going to discuss is the contrast. contrast is, essentially, the scale of difference between black and white in your images. by adding contrast to an image, you’re broadening the scale between the lightest and darkest part of your image and by removing contrast, you’re narrowing the scale between the lightest and darkest part of your image. personally, i prefer to leave my contrast slider alone 99% of the time. i like my images to have a bright and airy feel so contrast is not something i’m looking for. however, for this exercise and because i do make edits to my contrast from time to time, i’ve added contrast to this image. below you’ll see a side by side comparison of the image after my contrast adjustment.

as i’ve mentioned before, you may find that you really love the added contrast in the image on the right. and that’s awesome! one of my favorite photographers (and friends) adds contrast to her photos and i find that her photos are magical so don’t be afraid to play with edits to find a ‘look’ that feels like you. for me, the image on the left feels more like me so i’d simply export it and share it to my instagram gallery!
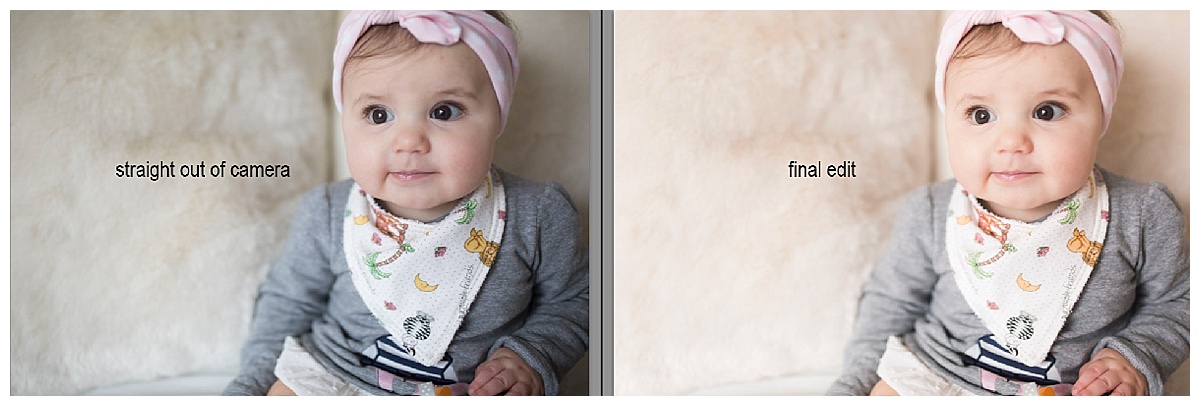
and just like that-with four very basic edits-i’ve taken an image straight from my camera and turned it into an image that i love. this week i challenge you to take your image and run it through the four basic editing steps. temperature, tint, exposure + contrast. take a few minutes to experiment with the sliders and find a look that truly reflects your photography style. don’t forget to post your images to social media using the hashtag #ClubClickPic! i can’t wait to see your images.